


The skin responds to deliberate touch. Pressure applied in the right direction, at the right depth, can redirect sluggish fluid, release fascial adhesions, and temporarily redraw the architecture of your face—no appointment necessary. Learning how to do facial massage at home isn't about replicating spa theatrics; it's about understanding the pathways of your lymphatic system and applying manual manipulation with intention. You'll feel the difference in minutes: that heavy, congested sensation lifts, jawlines sharpen, eyes open. This guide teaches the anatomical logic behind lymphatic drainage and the precise hand movements that deliver sculpting, depuffing results using nothing but your fingers and a lightweight oil.
Skill level: Beginner
Time per session: 8–12 minutes
Results visible: Immediately (temporary); cumulative with daily practice over 4–6 weeks

What You'll Need
- Clean hands (nails trimmed short to avoid dragging skin)
- A facial oil or serum with slip—look for formulations containing squalane (biomimetic, non-comedogenic) or rosehip seed oil (linoleic acid-rich, around 35–40% concentration, ideal for acne-prone types). The The Ordinary 100% Plant-Derived Squalane offers pharmaceutical-grade purity at roughly $8 per ounce—molecular weight around 422 Da, small enough to penetrate without occlusivity. Avoid thick balms; you need glide, not grip.
- A jade or stainless steel gua sha tool (optional but useful for broader plane work along the jawline and cheekbones)
- A mirror at eye level in good natural light
- A mental map of your lymphatic drainage points: pre-auricular nodes (in front of the ears), submandibular nodes (under the jawline), and supraclavicular nodes (above the collarbones)
You don't need expensive devices. Manual lymphatic drainage relies on pressure differential and directional flow, not vibration or microcurrent. If you've been experimenting with free beauty samples to find the right facial oil, this is where that trial inventory pays off—texture matters more than brand prestige here.
Step 1: Prime the Lymphatic Exit Points
Begin every session by opening the drainage pathways. Lymph doesn't circulate like blood; it relies on muscle contractions and external manipulation to move through one-way valves toward the thoracic duct.
Place three fingers on each side of your neck, just above your collarbones at the supraclavicular nodes. Press gently downward and inward, then release. Repeat this pumping motion ten times. You're priming the body's main lymphatic drainage site—the terminus where fluid from the face ultimately empties.
Next, trace from behind your ears down the sides of your neck toward those collarbones with flat palms, using sweeping strokes. Five passes on each side. The pressure should feel like smoothing lotion, not deep tissue work—lymphatic vessels sit superficially, just below the dermis, and respond to light, rhythmic touch (around 30–40 mmHg of pressure, less than a blood pressure cuff).
This prep step is non-negotiable. If the exit points are congested, pushing fluid toward them from your face accomplishes nothing. You're essentially clearing a drain before pouring water down it.
Step 2: Mobilize the Jawline and Submandibular Triangle
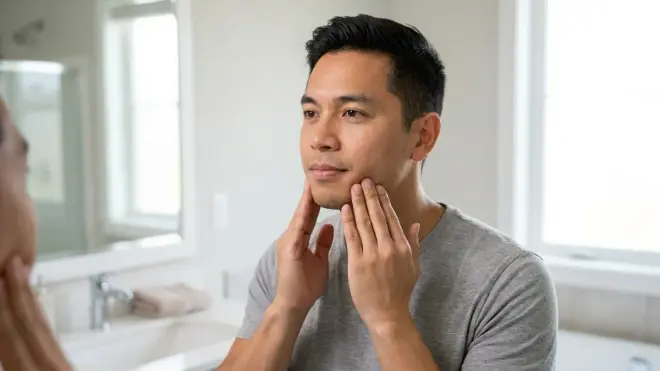
Tilt your head back slightly. Apply three to four drops of your chosen facial oil to your neck and jawline—enough for slip, not so much that your fingers slide without traction.
Starting at the center of your chin, use the pads of your index and middle fingers to press upward into the underside of your jawbone. Hold for two seconds. Now sweep outward along the jawline toward your ears, maintaining firm upward pressure. When you reach the hinge of your jaw, press gently into the soft hollow just below your earlobes—another lymphatic node cluster.
Repeat this chin-to-ear stroke eight times. Then reverse: starting just below your earlobes, sweep down the neck toward your collarbones. Eight passes.
You're creating a pathway: mobilize stagnant interstitial fluid along the jaw, guide it to the pre-auricular nodes, then flush it down the neck to the supraclavicular terminus. The submandibular triangle (the soft area under your chin, bordered by your jawbone) often holds visible puffiness; this is where poorly draining lymph pools overnight. If you wake with a doughy jawline, this step redistributes that accumulation.
Step 3: Sculpt the Cheeks and Release the Zygomatic Arch
Your cheekbones—the zygomatic arches—sit atop a dense network of lymphatic vessels and the buccinator muscle, which tightens with tension and habitual clenching.
Place your knuckles (second joints of your index and middle fingers) at the corners of your mouth. Press upward with moderate firmness and glide diagonally toward your temples, tracing the underside of your cheekbones. When you reach your temples, press and hold for three seconds, then sweep down in front of your ears toward your neck.
Six passes on each side.
Now address the fleshier part of your cheeks. Using flat fingers, sweep from the sides of your nose outward toward your ears in horizontal strokes. The motion should feel like you're smoothing fabric across a table. Eight passes.
This sequence does two things: it decongests the midface (where sinus pressure and allergies often cause fluid retention) and lifts the soft tissue by encouraging the skin's fascial layer to glide over the underlying muscle. The zygomatic arch area responds visibly—cheekbones appear higher, the nasolabial fold softens temporarily as fluid redistributes.
If you're exploring skin cycling protocols to maximize active ingredient absorption, facial massage fits beautifully on recovery nights—it enhances microcirculation without the irritation risk of actives.
Step 4: Drain the Eye Area and Orbital Rim
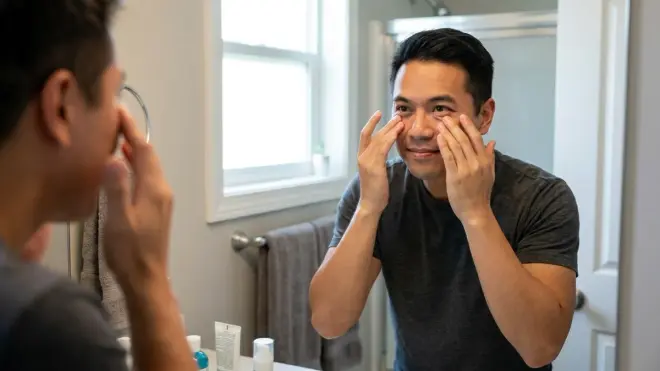
The periorbital region holds less than 0.5 mm of subcutaneous fat, which makes it exquisitely vulnerable to fluid accumulation. Morning puffiness here signals sluggish lymphatic return during sleep.
Use your ring fingers—they exert the least pressure. Starting at the inner corners of your eyes (beside the bridge of your nose), sweep gently along the orbital bone beneath your eye toward your temples. When you reach the outer corner, press lightly into the temple hollow, then continue the sweep down in front of your ears.
Repeat ten times per side.
Now address the upper eyelid and brow bone. Place your ring fingers at your inner brows and glide outward along the brow bone toward your temples, applying light upward pressure. Eight passes.
The key here is direction and gentleness. Lymph vessels in this area are fragile; aggressive manipulation causes broken capillaries and irritation. The ice rolling benefits many people chase—vasoconstriction and depuffing—can be achieved with manual drainage alone, though the two techniques complement each other well.
If you wear contact lenses or suffer from chronic dry eye, you may notice this step temporarily increases tear production. That's normal—you're stimulating the lacrimal drainage system.
Step 5: Release Forehead Tension and the Frontalis Muscle
The forehead holds chronic tension. The frontalis muscle contracts unconsciously during concentration, stress, and screen time, creating horizontal expression lines and a heavy, compressed feeling.
Place all four fingers of each hand flat against your forehead, fingertips meeting at the center. Apply firm pressure and sweep outward toward your temples, as if smoothing dough. When you reach your temples, press into the slight indentation (the temporal fossa) and hold for three seconds.
Eight full sweeps.
Next, work vertically. Starting at your brows, press your fingertips upward in short, firm strokes toward your hairline. Cover the entire forehead in vertical strips, working from center to sides. This technique addresses the corrugator supercilii muscles (the ones that create the "11" lines between your brows) and releases fascial adhesions that limit skin mobility.
Finish by placing your palms flat over your entire forehead and applying gentle downward pressure for ten seconds. Breathe slowly. This signals the parasympathetic nervous system—manual facial techniques lower cortisol and activate the vagal response, which directly influences lymphatic motility.
Step 6: Integrate the Neck and Décolletage
The neck and upper chest are afterthoughts in most skincare routines, yet they're critical to facial lymphatic drainage. Neglecting this area is like trying to empty a bathtub without opening the drain.
Apply more facial oil if your skin has absorbed the initial application. Using flat palms, sweep from your jawline down the sides of your neck toward your collarbones in broad, firm strokes. Ten passes on each side.
Now address the anterior neck. Tilt your head back slightly. Using alternating hands, sweep from just below your chin down the front of your throat toward your collarbones. The motion should be firm but never uncomfortable—the sternocleidomastoid muscles lie beneath, and you don't want to compress the trachea.
Eight strokes per hand.
Finally, work the décolletage. Place one hand flat on the opposite upper chest and sweep outward toward your armpit, following the natural direction of lymphatic flow toward the axillary nodes. Repeat on both sides, six passes each.
This step is where the systemic benefits become apparent. You're not just depuffing your face; you're facilitating whole-body lymphatic circulation. The connection to how to glow up for free principles is direct—manual techniques cost nothing and deliver measurable aesthetic and wellness returns.
Step 7: Seal with Gentle Tapping and Acupressure Points
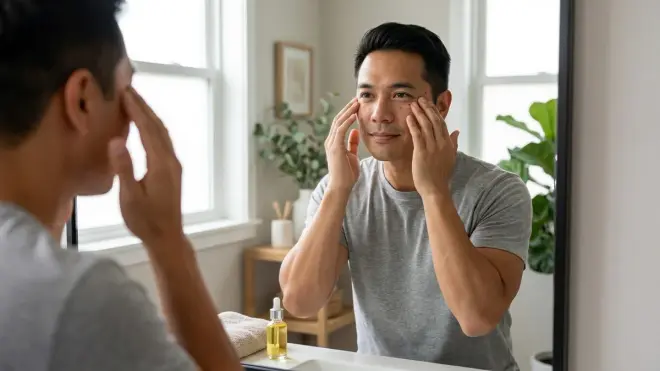
Finish with stimulation to promote microcirculation and product absorption.
Using your fingertips, tap rapidly across your entire face—forehead, cheeks, jawline, under eyes—with the lightness of rain on a window. This percussion technique increases blood flow to the capillary beds and primes skin for any serums or actives you'll apply post-massage.
Thirty seconds of tapping.
Now activate key acupressure points:
- Yintang (third eye point, between your brows): Press gently with your middle finger for five seconds
- Sibai (under the center of each eye, on the infraorbital ridge): Press for five seconds
- Jiache (at the angle of your jaw, where you feel the masseter muscle bulge when you clench): Press for five seconds
These points correspond to pathways in traditional Chinese medicine believed to regulate qi and blood flow. From a cosmetic chemistry perspective, pressure on these sites stimulates mechanoreceptors in the dermis, triggering localized inflammatory mediators that temporarily plump the skin and enhance absorption of subsequent products.
Step 8: Apply Actives on Primed Skin (Optional but Strategic)
Your skin is now flushed, warm, and receptive. If you're using targeted treatments—niacinamide serums (look for 5–10% concentrations for barrier support and sebum regulation), peptide complexes (particularly matrixyl or copper peptides for collagen synthesis), or low-percentage retinoids (0.25–0.5% retinol or encapsulated retinaldehyde for beginners)—this is the moment.
Massage increases transdermal penetration by temporarily disrupting the stratum corneum's lipid bilayers and dilating capillaries. Studies on topical delivery systems show that mechanical manipulation can enhance active ingredient absorption by up to 30–40% compared to static application.
Pat—don't rub—your serums into skin. The lymphatic work is done; now you're simply delivering ingredients to newly receptive tissue.
If you're building a comprehensive regimen, the principles of barrier-first beauty apply here: lymphatic drainage reduces inflammatory signaling, which indirectly supports the skin's lipid barrier and microbiome balance.
Pro Tips & Common Mistakes
The pressure paradox: Most beginners press too hard, assuming deeper is better. Lymphatic vessels respond to light, rhythmic pressure—think "gentle persuasion," not deep tissue massage. If you leave red marks or experience soreness, you've overdone it.
Direction is everything. Random circular motions feel pleasant but accomplish little. Lymph moves in one direction only: from face → neck → collarbones → thoracic duct. Every stroke must follow this pathway or you're simply redistributing fluid without draining it.
Don't skip the prep step. Opening the supraclavicular nodes first is like unclogging a pipe before running water. If you start at your face, you'll push fluid into already-congested pathways.
Timing matters for visible results. Morning sessions address overnight fluid accumulation; evening sessions release tension and prepare skin for active ingredient absorption during cellular repair hours (10 PM–2 AM, when mitochondrial activity peaks).
Oil selection impacts glide and comedogenicity. Squalane and rosehip work for most skin types. Avoid coconut oil (high in lauric acid, comedogenic for many), mineral oil (petroleum-derived, sits on surface), and synthetic silicones (they provide slip but don't nourish). If you're acne-prone, stick to oils with linoleic acid content above 50%—they're structurally similar to skin's natural sebum and less likely to congest pores.
Consistency trumps intensity. Five minutes daily outperforms a twenty-minute session once weekly. Lymphatic vessels respond to regular mechanical stimulation; sporadic effort yields sporadic results.
Frequently Asked Questions
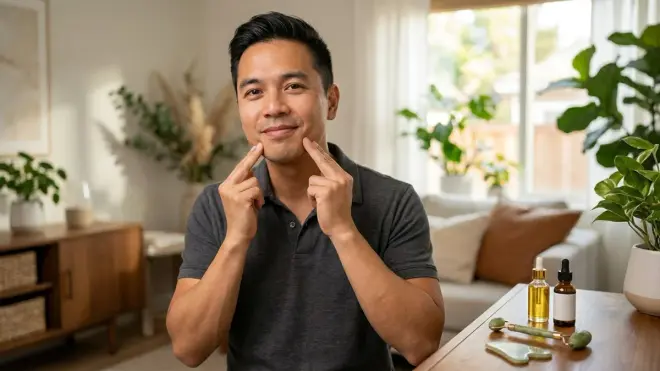
How often should I do facial massage at home for lymphatic drainage?
Daily practice delivers the most visible and sustained results, ideally in the morning to address overnight fluid accumulation and again in the evening to release muscular tension and enhance product absorption. Your lymphatic system responds to consistent mechanical stimulation—think of it as training your tissues to drain more efficiently over time. You'll notice immediate depuffing after each session, but cumulative effects like improved skin tone, reduced chronic puffiness, and more defined facial contours typically emerge after four to six weeks of daily 8–12 minute sessions.
Can facial massage replace professional lymphatic drainage treatments?
Manual home techniques replicate the directional logic and pressure principles of professional lymphatic drainage but lack the anatomical precision and pressure calibration a trained therapist provides. You can achieve meaningful depuffing, tension release, and temporary sculpting at home, but professionals access deeper fascial layers and employ specialized techniques for conditions like chronic sinus congestion or post-surgical swelling that require clinical expertise. Consider home practice your maintenance protocol and professional sessions your periodic deep intervention—they're complementary, not substitutes.
**What's the difference between lymphatic drainage and facial sculpting massage?
**Lymphatic drainage focuses on moving interstitial fluid through superficial vessels toward drainage nodes using light, rhythmic, directional strokes—the goal is decongestion and detoxification. Facial sculpting incorporates deeper pressure on muscles and fascia to release tension, improve tissue mobility, and temporarily redefine contours through manual lifting and smoothing techniques. Most effective home protocols blend both approaches: you open lymphatic pathways first (drainage), then apply firmer sculpting strokes to address muscle tightness and fascial adhesions. The oil or serum you use should provide enough slip for the light lymphatic work but enough traction for the deeper sculpting passes.
Is it safe to do facial massage if I have acne or active breakouts?
Yes, with modifications—avoid direct pressure on inflamed pustules or cystic lesions, which can rupture and spread bacteria, but gentle lymphatic drainage around affected areas actually supports healing by reducing localized inflammation and improving waste removal from congested tissue. Use a non-comedogenic oil like squalane or jojoba (not thick balms or coconut oil), ensure your hands are freshly washed, and focus on light, sweeping strokes rather than deep pressure. If you have active rosacea or broken capillaries, keep pressure extremely gentle and avoid aggressive pulling or stretching, which can exacerbate vascular inflammation—the ring-finger technique for the eye area is a good pressure reference for the entire face in these cases.
Summary
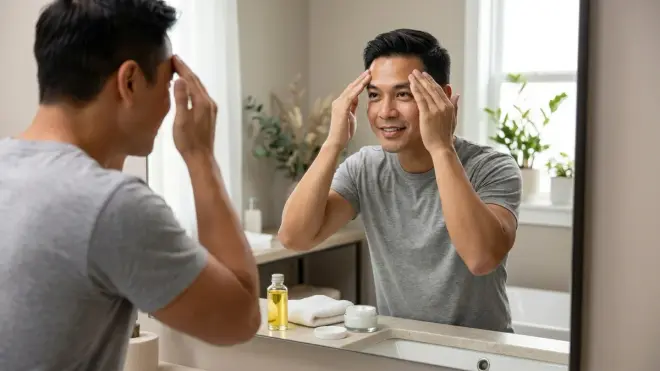
Learning how to do facial massage at home transforms a zero-cost daily ritual into a measurable depuffing, sculpting, and wellness practice. The science is straightforward: manual manipulation redirects sluggish lymphatic fluid, releases fascial tension, and enhances microcirculation, delivering both immediate visible effects and cumulative structural benefits. You need nothing but clean hands, a lightweight facial oil, and an understanding of directional flow—from face to neck to collarbones, always following your body's one-way lymphatic pathways. Eight to twelve minutes of deliberate touch each morning rewrites your face's baseline: less puffiness, sharper contours, skin that responds more eagerly to the actives you layer on afterward. No appointment, no device, no cost. Just anatomy, intention, and your own two hands.