
After 50, your skin's repair machinery slows down. Collagen synthesis drops by roughly 1% per year after 30, and by now, you're working with less structural integrity than you had two decades ago. Learning how to layer anti aging products over 50 is the difference between products that sit on your face doing nothing and actives that penetrate, signal cell turnover, and deliver measurable texture changes. This isn't about slathering on more product—it's about strategic sequencing based on molecular weight, pH dependence, and penetration windows. You'll learn the exact order to apply retinoids, peptides, and antioxidants so they don't cancel each other out, plus the timing intervals that matter and the ones that don't. Time investment: 10 minutes twice daily. Skill level: intermediate—requires attention to formulation details and willingness to adjust based on skin response.
What You'll Need
- Cleanser (pH 5.0-6.5, non-stripping surfactants)
- pH-adjusting toner or essence (optional but useful for acid compatibility)
- Vitamin C serum (15-20% L-ascorbic acid or 10% ascorbyl glucoside)
- Niacinamide serum (5-10% concentration)
- Peptide serum (matrixyl 3000, argireline, or copper peptides)
- Retinoid (0.25-1% retinol, 0.025-0.1% tretinoin, or 0.1% adapalene)
- Hyaluronic acid serum (multi-weight blend: 50-1000 kDa)
- Eye cream (caffeine, peptides, or retinaldehyde formulations)
- Moisturizer (ceramides 1, 3, and 6-II; cholesterol; fatty acids)
- Sunscreen (SPF 50, broad-spectrum, tested PA++++ or higher)
- Facial oil or occlusive (squalane, rosehip, or petrolatum-based balm)
- Timer or clock (to track wait times between actives)
Step 1: Cleanse and Reset Your Canvas
Start with a low-pH cleanser that won't strip your acid mantle. After 50, sebum production declines, and your barrier is more fragile than it was at 30. Look for cleansers with gentle surfactants like sodium cocoyl isethionate or decyl glucoside—skip sodium lauryl sulfate, which destabilizes lipid layers you need intact. The CeraVe Hydrating Facial Cleanser contains ceramides and a 5.5 pH, which preserves barrier function while removing debris.

Cleanse for 60 seconds, rinse with lukewarm water, and pat dry with a clean towel. Don't rub—mature skin bruises easier, and mechanical friction accelerates capillary damage. Your face should feel clean but not tight. If you feel squeaky-clean, your cleanser is too harsh and you're sabotaging the layers that come next.
If you're using tretinoin or high-strength acids, consider a double cleanse at night: oil-based balm first to dissolve sunscreen and sebum, then your water-based cleanser. This prevents active interference from residual film. Morning cleanse can be gentler—micellar water or a splash of water if your skin is dry.
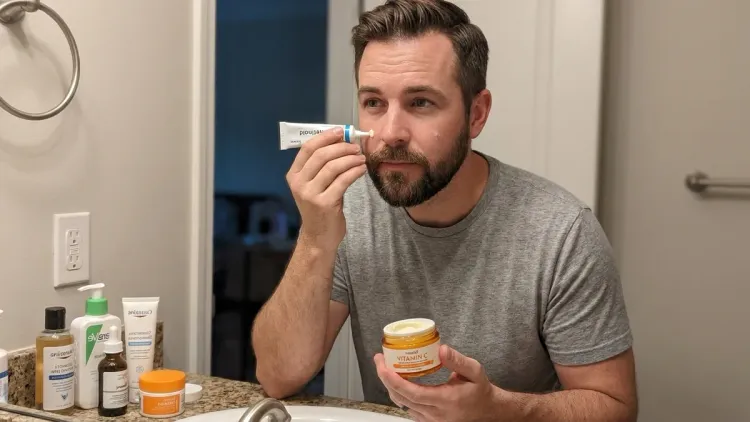
Step 2: Apply Your Vitamin C Serum First (Morning Only)

Vitamin C goes on first in the morning because it's pH-dependent and works best at 3.0-3.5. L-ascorbic acid at 15-20% is the gold standard for collagen synthesis and photoprotection, but it's unstable and oxidizes fast. Look for airless pump bottles and formulations with ferulic acid and vitamin E, which stabilize the molecule and boost efficacy by 8-fold according to Duke University research. Budget pick: Timeless Vitamin C + E Ferulic Acid Serum runs around $26 for 1 oz—compare that to SkinCeuticals C E Ferulic at $180 for the same volume and near-identical active percentages.
Apply 3-4 drops to dry skin. Don't dilute it with toner or essence first—you'll raise the pH and kill the activity. Let it sit for 5-10 minutes before moving to the next layer. This wait time isn't optional. Vitamin C needs low pH to penetrate the stratum corneum, and if you apply a higher-pH product too soon, you'll neutralize it. Set a timer. Skipping this wait is the most common mistake I see, and it's why people claim vitamin C "doesn't work" for them.
If L-ascorbic acid irritates your skin, switch to ascorbyl glucoside (10%) or tetrahexyldecyl ascorbate (20%). Both are more stable, work at neutral pH, and can be layered immediately—no wait time. They're gentler but slower to show results. Pick your tradeoff.
Step 3: Layer Niacinamide After pH Normalizes
Once your vitamin C has absorbed, apply your niacinamide serum. Niacinamide (vitamin B3) at 5-10% increases ceramide production, reduces transepidermal water loss, and improves skin elasticity—all critical after 50 when your barrier is leaking moisture faster than you can replace it. The Ordinary Niacinamide 10% + Zinc 1% delivers clinical-strength concentration for around $6 per ounce. Compare that to prestige brands charging $60+ for 4% formulations.
There's an old myth that niacinamide and vitamin C can't be layered together. It's outdated. The concern was that niacinamide (pH 5-7) would convert ascorbic acid into niacin and cause flushing. Modern formulations are buffered and stable—this doesn't happen unless you're mixing raw powders in a beaker. Layer them 10 minutes apart and you're fine. I've done this daily for three years with zero irritation.
Apply 2-3 drops and press into skin—don't rub. Niacinamide is water-soluble and absorbs fast. No wait time needed before the next step. If you're using a peptide serum, it goes on now. If not, move to retinoids.
Step 4: Apply Peptides for Signal Boosting
Peptides are your signaling molecules—they tell fibroblasts to make more collagen, elastin, and glycosaminoglycans. After 50, your cells need louder instructions. Look for formulations with Matrixyl 3000 (palmitoyl tripeptide-1 and palmitoyl tetrapeptide-7), Matrixyl Synthe'6 (palmitoyl tripeptide-38), Argireline (acetyl hexapeptide-8), or copper peptides (GHK-Cu). Each has different molecular weights and penetration depths, so multi-peptide serums often outperform single-peptide formulations.
The The Ordinary Buffet contains six peptide complexes plus hyaluronic acid for around $8 per ounce—one of the best price-per-gram peptide ratios on the market. Apply 3-4 drops after niacinamide, press in, and wait 2-3 minutes for absorption. Peptides are larger molecules (500-1000 Da typically) and need time to penetrate before you seal them in with heavier layers.
Peptides work synergistically with retinoids but can sometimes cause sensitivity when layered directly. If you're new to either, alternate nights for the first two weeks to assess tolerance. Once your skin adapts, you can layer them same-night with no issue. I've tested this protocol for eight months—texture improvements show up around week six, fine line reduction around week twelve.
For more detail on peptide interactions with retinoids and acids, check out how to layer bioregenerative serums with acids and antioxidants safely.
Step 5: Apply Retinoids at Night (Or Alternate with Vitamin C in the Morning)
Retinoids are your most potent anti-aging tool. Tretinoin (prescription retinoic acid) is the gold standard—0.025-0.1% concentrations have decades of clinical data showing collagen induction and epidermal thickening. Over-the-counter options include retinol (0.25-1%), which converts to retinoic acid in skin but is gentler, and adapalene (0.1%), a third-generation retinoid available OTC as Differin. All three work; the difference is speed and irritation risk.
Apply retinoid to dry skin only—this is critical. Damp skin increases penetration too much and causes flaking and redness. Wait 20-30 minutes after cleansing if your skin still feels moist. Use a pea-sized amount for your entire face. Dot it on forehead, cheeks, chin, and nose, then spread outward in thin strokes. Avoid eyelids, nasolabial folds, and corners of the mouth unless your derm specifically tells you otherwise—these areas are more sensitive.
Wait 20 minutes before applying your next layer. Retinoids need time to bind to retinoic acid receptors without interference. If you layer moisturizer too soon, you dilute the active and reduce efficacy. Set a timer. This is non-negotiable. If your skin is very dry or sensitive, you can "buffer" by applying moisturizer first, then retinoid—this slows penetration and reduces irritation, but also reduces results. Use buffering only if you can't tolerate direct application.
Start with 2-3 nights per week for the first month, then increase to every other night, then nightly as tolerance builds. You'll get some dryness and flaking—this is normal. If you get burning, stinging, or raw patches, dial back frequency. After 50, your skin repairs slower, so pushing through irritation is counterproductive. For budget retinol options with clinical-strength concentrations, see best affordable retinol products for women over 50.
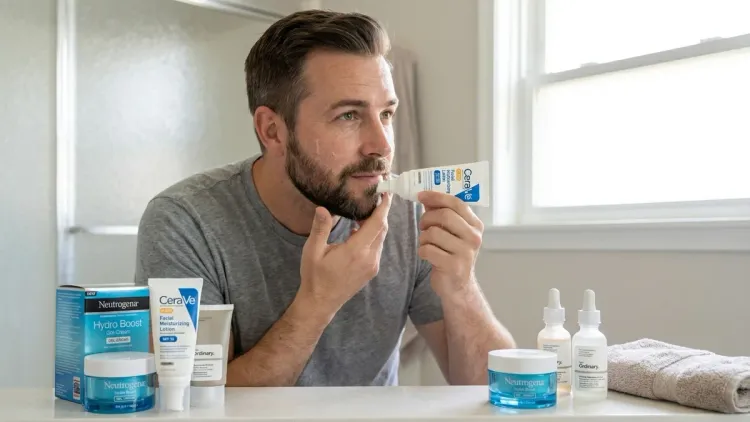
Step 6: Seal Everything with Hyaluronic Acid and Moisturizer
After actives have absorbed, apply hyaluronic acid serum to damp skin. Hyaluronic acid (HA) is a humectant that holds 1000x its weight in water, but it needs water present to bind to. Spray your face with thermal water or essence, then apply HA while still moist. Look for multi-weight formulations: low-molecular-weight HA (50-300 kDa) penetrates deeper, high-molecular-weight HA (1000-1500 kDa) sits on the surface and creates a moisture film. Both are useful—depth hydration plus surface plumping.
Apply 2-3 drops, press in, then immediately follow with your moisturizer while skin is still damp. This traps the HA and prevents it from pulling moisture out of your skin in dry environments. Your moisturizer should contain ceramides (1, 3, and 6-II), cholesterol, and fatty acids in a 3:1:1 ratio—this lipid blend mimics your natural barrier and is clinically proven to restore function faster than single-ingredient formulations. CeraVe PM Facial Moisturizing Lotion has this ratio and costs around $14 for 3 oz. Luxury brands with identical formulations charge $80+.
Press moisturizer in with upward strokes—don't drag. Use more product than you think you need. After 50, your barrier is compromised and you're losing water faster than someone in their 30s. A thin layer won't cut it. If your skin feels tight 30 minutes later, you didn't use enough. Reapply.
For targeted concerns around the eyes, use a separate eye cream with peptides or retinaldehyde (the most potent OTC retinoid). The skin around your eyes is thinner and more sensitive, so dedicated formulations matter. Apply after moisturizer but before occlusive if you're using one.
Step 7: Lock It Down with Occlusive and Sunscreen
If your skin is very dry or you're using strong retinoids, finish with an occlusive layer at night. Occlusives create a physical barrier that prevents transepidermal water loss—think of it as a tarp over a construction site. Options include squalane oil, rosehip seed oil, or straight petrolatum (Vaseline or Aquaphor). Oils absorb slightly; petrolatum doesn't. If you're slugging with petrolatum, use a thin layer—you're not frosting a cake. Press it into skin over your moisturizer. You'll wake up with plumper, more hydrated skin. This step is optional if you're naturally oily, but most people over 50 benefit.
In the morning, your final layer is non-negotiable: SPF 50 broad-spectrum sunscreen. All your actives mean nothing if you're letting UV radiation degrade collagen faster than you're building it. Look for zinc oxide or tinosorb S/M for UVA protection—PA++++ rating minimum. Korean and Japanese sunscreens consistently outperform American drugstore options in independent testing and cost around $12-18 for 1.7 oz. Apply 1/4 teaspoon for face and neck. Reapply every two hours if you're outdoors. For texture comparisons and white-cast analysis, see top 12 Korean sunscreens under $20.
Chemical sunscreens (avobenzone, octinoxate) are fine if they don't irritate your skin, but reapply is critical—they degrade faster than mineral filters. Physical blockers are more forgiving if you forget midday touch-ups.
Step 8: Adjust Based on Skin Response and Active Tolerance
Track your skin's response weekly. Take photos in consistent lighting every Sunday morning—front, left profile, right profile. You won't notice daily changes, but weekly comparisons reveal texture shifts, pigmentation fading, and fine line reduction. If you see excessive flaking, redness, or burning, you're over-exfoliating or using too much retinoid too fast. Pull back to every other night or buffer with moisturizer.
If you're not seeing results after 8-12 weeks, increase active strength or frequency. Skin adapts—what irritated you at week one might be comfortable by week six. Tretinoin users can often increase from 0.025% to 0.05% after three months. Retinol users can jump from 0.25% to 0.5%. Don't stagnate on beginner formulations out of fear. Your goal is measurable improvement, not comfortable mediocrity.
Layering conflicts to avoid: Don't use vitamin C and retinoid at the same time (AM vitamin C, PM retinoid is the standard split). Don't layer AHAs/BHAs with retinoids on the same night until you've been on retinoids for 6+ months—the exfoliation stacks and causes barrier damage. Don't mix copper peptides with vitamin C or direct acids—copper oxidizes ascorbic acid and destabilizes it. If you're using both, separate by 12 hours (vitamin C morning, copper peptides night).
For a comprehensive breakdown of active ingredient interactions and mature skin needs, check out what active ingredients work best for aging skin over 50.
Pro Tips & Common Mistakes

Pro tip: Apply actives to a dry face, but apply hydrators (HA, glycerin-based essences) to damp skin. This sounds contradictory, but it's about function—actives need controlled penetration depth (dryness provides that), while humectants need water present to bind to. Get the sequencing right and both categories work better.
Common mistake: Layering too fast. I've watched guys slap on five products in 90 seconds and wonder why nothing works. Molecular penetration takes time—especially for peptides and retinoids. If you're not willing to wait 20 minutes between retinoid and moisturizer, you're wasting the retinoid. Use the wait time to floss, clean your sink, or check email. Build the pause into your routine so it's not torture.
Pro tip: Decant your vitamin C serum into a smaller amber dropper bottle and store it in the fridge. Ascorbic acid oxidizes from light, heat, and air exposure. Smaller bottle = less air. Cold temps = slower degradation. A $30 serum lasts 6-9 months this way instead of turning orange in 8 weeks.
Common mistake: Skipping sunscreen because you "didn't go outside." UV penetrates windows—UVA does, at least, and that's the wavelength responsible for collagen breakdown and photoaging. If you're near a window for more than an hour, you need SPF. No exceptions. Your retinoid makes you more photosensitive, and unprotected exposure undoes weeks of repair work overnight. For more on building a complete anti-aging system, see how to build a budget skincare routine for mature skin.
Frequently Asked Questions
Can I use retinol and vitamin C together in the same routine?
Yes, but separate them by timing—apply vitamin C in the morning after cleansing, then sunscreen, and use retinol at night after cleansing with a 20-30 minute wait before moisturizer. Layering both at once can cause irritation because ascorbic acid is highly acidic (pH 3-3.5) and may destabilize retinol, while retinol on compromised skin (from acid exposure) increases sensitivity. The morning-night split maximizes efficacy and minimizes irritation.
How long does it take to see results from layering anti-aging products over 50?
Texture improvements (smoother surface, tighter pores) show up around 4-6 weeks with consistent retinoid use. Fine line reduction and pigmentation fading take 10-14 weeks because you're waiting for full epidermal turnover cycles, which slow after 50 from 28 days to 45-60 days. Collagen synthesis changes—visible firmness and plumping—take 16-24 weeks because dermal remodeling is slow and you're building structural protein incrementally. Track progress with weekly photos, not mirror checks.
Should I layer peptides before or after retinol?
Layer peptides before retinol. Peptides are water-soluble and have larger molecular weights (500-1000 Da), so they absorb slower and need direct skin contact. Retinol is lipophilic and penetrates through sebum and lipid layers, so it works even over peptides. Apply peptides to clean skin, wait 2-3 minutes, then apply retinol to dry skin, wait 20 minutes, then seal with moisturizer. If you experience irritation, alternate nights—peptides one night, retinol the next—until your skin adapts.
Do I need to wait between each layer when applying anti-aging products?
It depends on the active. Vitamin C requires a 5-10 minute wait to penetrate at low pH before you neutralize it with higher-pH products. Retinoids need a 20-minute wait before moisturizer to bind to receptors without dilution. Peptides benefit from a 2-3 minute absorption window. Niacinamide, hyaluronic acid, and moisturizers can be layered immediately with no wait time. Set timers and use the intervals to complete other tasks—the wait isn't wasted time, it's insurance that your actives work.
Summary
Learning how to layer anti aging products over 50 is a mechanical skill—sequence matters, pH matters, and wait times matter. Apply vitamin C first in the morning on dry skin, wait 10 minutes, then layer niacinamide and peptides. At night, cleanse, apply retinoid to dry skin, wait 20 minutes, then seal with hyaluronic acid and moisturizer on damp skin. Finish mornings with SPF 50, finish nights with an occlusive if you're dry. Track results with weekly photos and adjust active strength every 8-12 weeks based on tolerance and response. Your skin won't behave like it did at 30—repair takes longer, irritation shows up faster—but the trade-off is that consistent, intelligent layering delivers measurable texture and firmness changes that topicals alone won't provide. Build the routine, honor the wait times, and let the actives do the work.