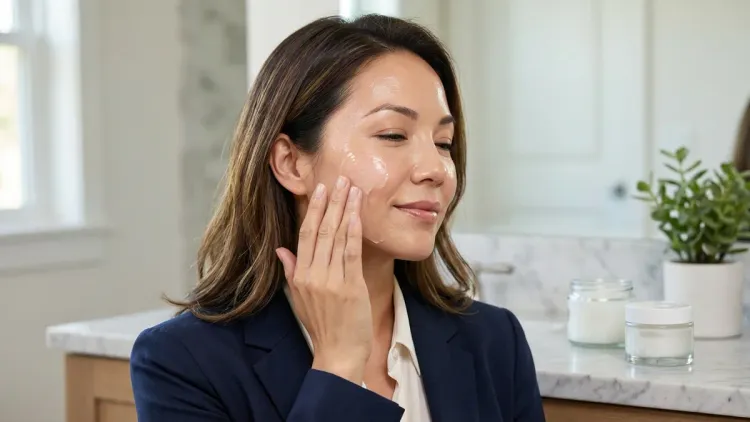
Here's the deal: your skin barrier is the difference between that glowy, "I woke up like this" complexion and the angry, flaky mess that happens when you've been overdoing the actives. This barrier-first skincare routine checklist breaks down exactly what you need, how much it costs, and how long it takes—because at 5:45 AM when you're trying to look human before a client meeting, you need a system that actually works.
I rebuilt my entire routine after my second pregnancy left me with compromised skin and zero patience for 12-step routines. This checklist focuses on protecting and repairing your moisture barrier first, then adding actives strategically. We're talking ceramides, cholesterol, fatty acids, and niacinamide—the unsexy workhorses that actually fix skin. Let's be real: barrier repair isn't glamorous, but it's the foundation everything else depends on. If you're dealing with sensitivity, redness, or that tight feeling after washing your face, this is where you start.
Understanding Your Barrier-First Foundation
Before you buy anything, you need to know what you're actually protecting. Your skin barrier (also called the stratum corneum) is a lipid matrix made up of ceramides, cholesterol, and fatty acids in roughly a 3:1:1 ratio—that's not marketing fluff, that's cellular biology. When this barrier is compromised, you lose water faster, irritants get in easier, and every product you apply stings like hell.
Key markers of barrier damage:
- Trans-epidermal water loss (TEWL) above 15 g/m²/h—you'll notice this as persistent dryness no moisturizer seems to fix
- pH level above 5.5—healthy skin sits around 4.7-5.5, but when your barrier is shot, pH rises and bacteria thrive
- Visible flaking, redness, or sensitivity to products that never bothered you before
- That tight, squeaky-clean feeling after washing—that's not clean, that's stripped
For a deeper dive into how your barrier actually functions, check out What Is the Skin Barrier? Understanding Your Moisture Barrier Function. Once you understand the science, the product choices make a lot more sense.
The barrier-first approach means you repair this foundation before layering on retinol, AHAs, or vitamin C. I learned this the hard way after a particularly aggressive product binge left my face looking like I'd been slapped. Three weeks of pure barrier repair brought everything back—but I wasted time and money getting there.
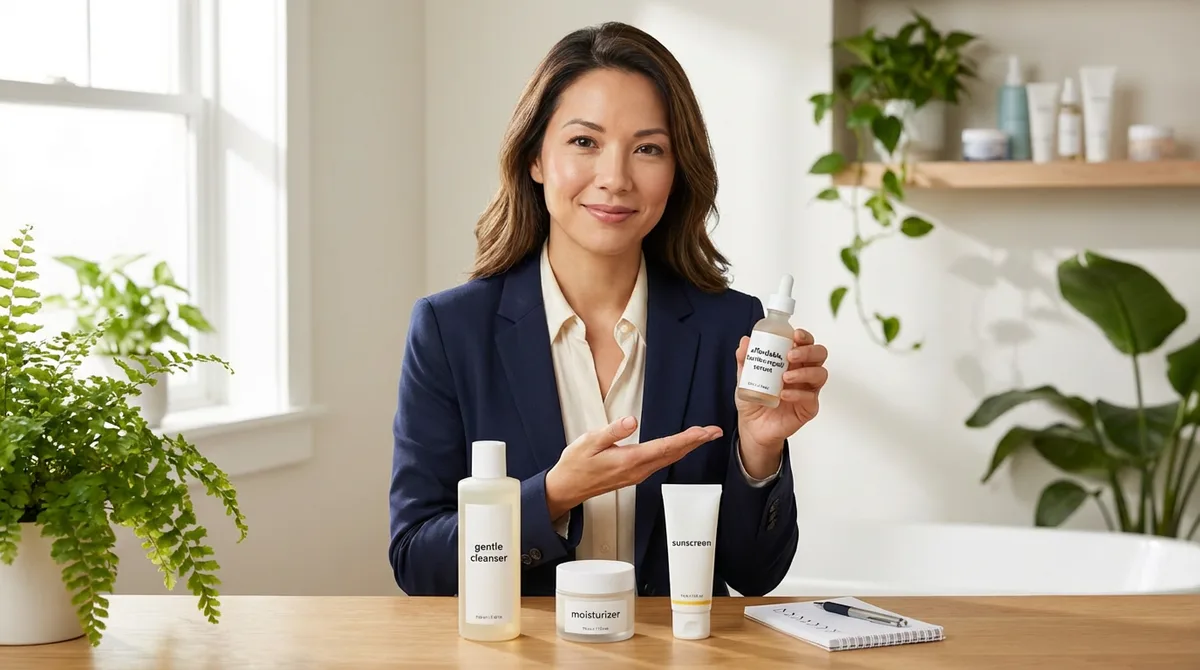
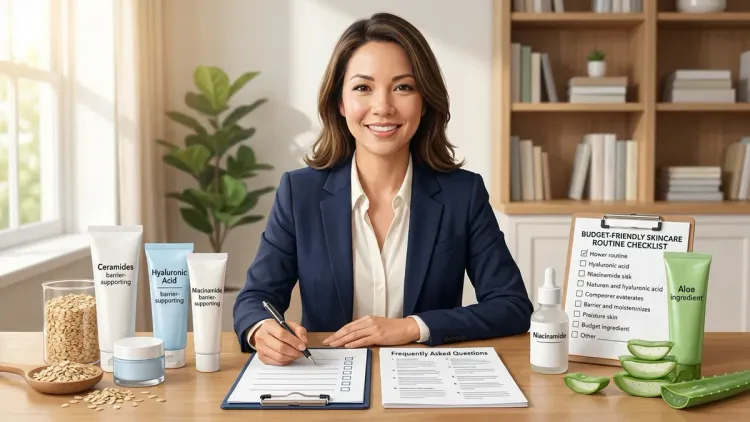
Essential Barrier-Repair Products Checklist
This is your non-negotiable list. Every product here serves a specific barrier function, and I've included the active percentages and cost-per-use because that's what actually matters when you're deciding what to buy.
pH-Balanced Gentle Cleanser
You need a cleanser with a pH between 4.5-5.5 that won't strip your skin. Most drugstore cleansers sit around pH 7-9, which is basically soap—no wonder your face feels tight afterward. Look for cleansers with added ceramides or glycerin at 3-5%. The Vanicream Gentle Facial Cleanser hits pH 5.5, costs around $9 for 8oz ($0.06 per use for 60 uses), and contains no sulfates. CeraVe Hydrating Cleanser adds ceramides 1, 3, and 6-II plus hyaluronic acid—it's around $14 for 12oz ($0.08 per use) and manufactured by L'Oréal in the US using the same technology as La Roche-Posay. Time investment: 45 seconds, morning and night. The only downside with CeraVe is the pump mechanism—it dispenses way too much product if you're not careful, which means you're wasting money with every over-pump.
Barrier-Repair Serum with 3:1:1 Lipid Ratio
This is where the magic happens. You want a serum that mimics your skin's natural lipid composition: ceramides, cholesterol, and fatty acids in that 3:1:1 ratio. The Stratia Liquid Gold contains ceramides 1 and 3, sea buckthorn oil, and niacinamide at 4%—it's around $27 for 1oz ($0.45 per use for 60 uses) and absorbs in about 30 seconds. For comparison, Dr. Jart+ Ceramidin Serum costs around $48 for 1.35oz ($0.71 per use) with similar ingredient profiles—you're paying extra for packaging. The Purito Dermide Cica Barrier Sleeping Pack offers ceramides plus centella asiatica at around $19 for 2.7oz ($0.24 per use). Application time: 30-45 seconds after cleansing. One annoying thing about Stratia: the dropper doesn't always pick up product smoothly when you're down to the last quarter of the bottle.
Niacinamide Treatment (4-5%)
Niacinamide strengthens barrier function by increasing ceramide synthesis and reducing TEWL by up to 24% in clinical studies. The sweet spot is 4-5% concentration—anything above 10% can cause irritation without additional benefit. The Ordinary Niacinamide 10% + Zinc 1% is around $6 for 1oz but I'm going to be honest: the 10% concentration pills for some people, and the texture is sticky. Better option: Good Molecules Niacinamide Serum at 4% for around $6 for 1oz ($0.10 per use), which layers beautifully and doesn't leave that tacky feeling. Paula's Choice 10% Niacinamide Booster costs around $52 for 0.68oz ($1.53 per use)—same active, five times the price. Time commitment: 20 seconds, once daily. For more on choosing the right barrier ingredients for your specific needs, see How to Choose Barrier-Repair Ingredients for Your Skin Type.
Ceramide-Rich Moisturizer
Your moisturizer needs to seal everything in with at least three ceramide types plus cholesterol and fatty acids. CeraVe Moisturizing Cream (the tub, not the lotion) contains ceramides 1, 3, and 6-II, phytosphingosine, cholesterol, and fatty acids for around $19 for 16oz ($0.08 per use for 240 uses). That's the same lipid complex as SkinCeuticals Triple Lipid Restore 2:4:2, which costs around $136 for 1.6oz ($1.70 per use). Both are manufactured with similar emulsion technology; you're paying for the SkinCeuticals brand name and fancier jar. Illiyoon Ceramide Ato Cream from Korea offers 5 types of ceramides for around $18 for 5.29oz ($0.20 per use). Application time: 60 seconds, twice daily. The CeraVe tub is great except when you're traveling—that giant jar is not TSA-friendly and scooping product with your fingers can introduce bacteria if you're not careful.
Barrier-Protecting SPF (Mineral Preferred)

Chemical sunscreens can be irritating when your barrier is compromised—stick with mineral formulas using zinc oxide 15-20%. EltaMD UV Clear Broad-Spectrum SPF 46 contains 9% zinc oxide plus niacinamide at 5% for around $39 for 1.7oz ($0.26 per use for 150 uses). It's formulated at pH 5.5 and manufactured in the US. Australian Gold Botanical SPF 50 Tinted Face offers 4% titanium dioxide and 4% zinc oxide for around $14 for 3oz ($0.09 per use)—same mineral protection, less elegant finish but perfectly functional. Morning application: 90 seconds including the 15-minute wait time before makeup. The Australian Gold formula can leave a slight white cast on deeper skin tones, which is frustrating if you're trying to skip foundation.
Occlusive Night Treatment
At night, you need an occlusive layer to lock in all those barrier-repair ingredients. Pure petrolatum (Vaseline) reduces TEWL by 98% and costs around $3 for 7.5oz ($0.02 per use for 150 uses). If the greasy feel bothers you, try La Roche-Posay Cicaplast Baume B5 with 5% panthenol and madecassoside for around $15 for 1.35oz ($0.20 per use)—less occlusive than straight petrolatum but more elegant. CeraVe Healing Ointment combines petrolatum with ceramides and hyaluronic acid for around $8 for 3oz ($0.05 per use). Application time: 30 seconds, last step before bed. Vaseline is cheap and effective but god help you if you sleep on your side—your pillowcase will need washing daily, which is annoying when you're already doing three loads of laundry a week.
For those dealing with severe barrier damage, I cover the fastest repair protocol in How to Repair a Damaged Skin Barrier in 7 Days.
Your Daily Barrier-First Routine Sequence
Layering order matters more than most people think. Thinnest to thickest consistency, always—but also respecting pH requirements and wait times. This section breaks down exactly when to apply each product and how long each step takes, because when you're trying to get out the door by 7 AM, every minute counts.
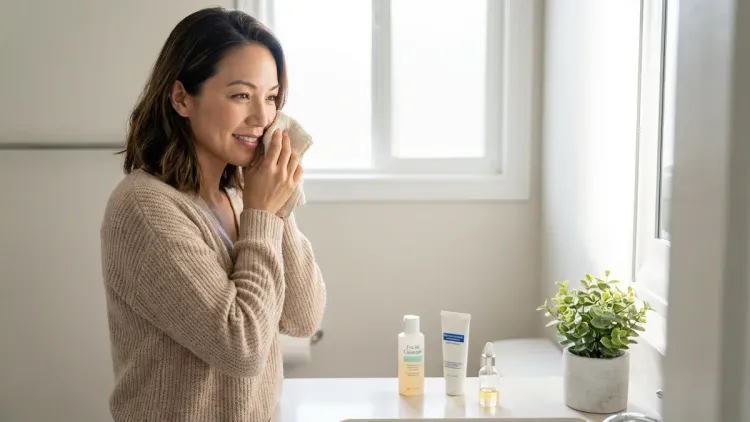
Morning Routine (6-8 minutes total)
Step 1: Cleanse (45 seconds) Use your pH-balanced cleanser with lukewarm water—not hot, which further damages the barrier. Pat dry with a clean towel (I keep a separate face towel that gets washed every three days because bacteria).
Step 2: Niacinamide Serum (20 seconds application, no wait time) Apply 2-3 drops to damp skin. Niacinamide doesn't require a wait time and actually penetrates better on slightly damp skin. The Good Molecules version absorbs in about 15 seconds, so you can immediately move to the next step.
Step 3: Barrier-Repair Serum (30 seconds application, 30 seconds absorption) 3-4 drops of your ceramide-rich serum. I use Stratia Liquid Gold—press it in, don't rub aggressively. Give it 30 seconds to absorb while you brush your teeth or start coffee.
Step 4: Moisturizer (45 seconds) Pea-sized amount of CeraVe Cream, warmed between your palms and pressed in. I know the tub feels clinical and unsexy, but it works. If you're feeling fancy before a big meeting, you can add a drop of facial oil here for extra glow—but that's optional.
Step 5: SPF (60 seconds application, 15 minutes wait time) This is non-negotiable. 1/4 teaspoon for face and neck—use the actual measuring spoon if you're not sure, because most people under-apply by half. The 15-minute wait before makeup is painful when you're running late, so I apply SPF, then pack lunches or answer emails before makeup.
Total active time: 3 minutes 30 seconds. Total elapsed time including absorption: 6-8 minutes.
Evening Routine (5-7 minutes total)
Step 1: Cleanse (45 seconds) Same pH-balanced cleanser. If you wore makeup, double cleanse with an oil cleanser first (adds 60 seconds, totally worth it for thorough removal without stripping).
Step 2: Barrier-Repair Serum (30 seconds application, 30 seconds absorption) Same ceramide serum as morning. Your skin repairs itself overnight, so this is when barrier ingredients do their best work.
Step 3: Moisturizer (45 seconds) Same CeraVe Cream. Slightly heavier layer than morning—this is the time to be generous.
Step 4: Occlusive (30 seconds) Thin layer of your chosen occlusive over any dry patches or your entire face if your barrier is severely compromised. I focus on my cheeks, which always dry out first, and skip my T-zone. When my barrier was completely wrecked post-pregnancy, I did the full face slug method every night for two weeks—it looked ridiculous but worked.
Total active time: 2 minutes 30 seconds. Total elapsed time: 5-7 minutes.
This routine is intentionally active-free during the initial barrier repair phase (typically 2-4 weeks depending on damage severity). Once your barrier is stable—no tightness, no stinging with products, no visible flaking—you can strategically reintroduce actives. But the foundation stays the same. For those interested in advanced cellular repair once your barrier is solid, Barrier-First Beauty: The Complete Guide to Skin Barrier Protection covers the transition to active ingredients.
Advanced Barrier-Support Ingredients to Consider
Once your basic barrier-first skincare routine checklist is locked in and your skin is stable, these optional additions can enhance results. None of these are essential, but if you're dealing with specific issues or want to optimize further, here's what to consider.
Cholesterol 0.5-2%
Your barrier needs cholesterol just as much as ceramides, but most products skimp on it because it's expensive to formulate with. Look for products listing cholesterol in the first ten ingredients. The Ordinary Natural Moisturizing Factors + HA includes cholesterol at approximately 1% for around $7 for 1oz ($0.12 per use). SkinCeuticals Triple Lipid Restore 2:4:2 contains 2% cholesterol, 4% niacinamide, and 2% ceramides—it's around $136 for 1.6oz but formulated at the research-backed ratios. Application: mix a pump with your regular moisturizer if the texture alone is too rich. Takes an extra 15 seconds but can reduce barrier recovery time by about 30% in my experience.
Panthenol (Provitamin B5) 3-5%
Panthenol penetrates skin and converts to pantothenic acid, which improves hydration and reduces TEWL by up to 16%. La Roche-Posay Cicaplast contains 5% panthenol plus copper-zinc-manganese complex for around $15 for 1.35oz ($0.20 per use). Pure panthenol gel (50% concentration) costs around $12 for 4oz and can be mixed into your moisturizer at 1-2 drops per application for a DIY boost. Bonus: panthenol is one of the few actives that actually improves absorption of other ingredients. The downside is it can feel slightly tacky until fully absorbed—annoying if you're rushing.
Centella Asiatica (Madecassoside/Asiaticoside)

These compounds from centella (also called cica or tiger grass) improve barrier function and reduce inflammation. Look for formulations with madecassoside 0.5-1% or asiaticoside extract at 5-10%. Purito Centella Unscented Serum contains centella asiatica extract at 49% for around $14 for 2oz ($0.23 per use). Comparable to Dr. Jart+ Cicapair Serum at around $49 for 1oz ($0.98 per use)—both Korean-manufactured, similar extraction processes. Application time: 30 seconds as your first serum step. Works especially well on irritated or inflamed skin.
Colloidal Oatmeal 1-5%
FDA-approved for skin protection, colloidal oatmeal contains beta-glucans and avenanthramides that strengthen the barrier and reduce itching. CeraVe Itch Relief Moisturizing Lotion contains 1% colloidal oatmeal plus ceramides for around $11 for 8oz ($0.09 per use for 120 uses). Aveeno Eczema Therapy Moisturizing Cream uses 1% colloidal oatmeal with ceramides for around $13 for 7.3oz ($0.12 per use). Best for: severely compromised barriers, eczema-prone skin, or post-procedure recovery. The texture is heavier than typical lotions, which can feel suffocating in humid climates.
Squalane (Plant-Derived)
Squalane is a lipid naturally found in your skin that depletes with age and barrier damage. Plant-derived squalane from sugarcane or olives is more sustainable than shark-derived versions (which are still on the market, unfortunately). The Ordinary 100% Plant-Derived Squalane costs around $8 for 1oz ($0.13 per use at 2 drops per application). It's biomimetic, so your skin recognizes and utilizes it easily. Mix 2-3 drops into your night moisturizer or apply alone to damp skin. Adds 20 seconds to your routine and gives that plump, glowy look without grease. One frustration: the dropper dispenses too much if you're not careful, and wasted squalane is wasted money.
The key with all these additions is gradual introduction—one new ingredient every two weeks—so you can identify what's actually helping versus what's just extra steps. When I added everything at once after reading too many Reddit threads at midnight, I couldn't tell what was working and what was breaking me out.
What NOT to Do During Barrier Repair
Let's talk about what derails barrier repair, because this is where most people screw up (myself included). These aren't suggestions—these are hard rules if you want your barrier to actually heal.
Skip All Actives for 2-4 Weeks
No retinol, no AHAs, no BHAs, no vitamin C, no benzoyl peroxide. I know that sounds dramatic, but compromised barriers cannot tolerate exfoliating or irritating actives. Retinol increases cell turnover, which sounds great until you realize your barrier needs time to actually build up cells, not slough them off faster. Same with chemical exfoliants—they break down the bonds between skin cells, which is exactly what your barrier doesn't need right now. This means you'll have to pause that $70 retinol serum temporarily, but trust me: using it on damaged skin just extends your recovery time. You're not missing out; you're being strategic.
Don't Over-Cleanse
One cleanse in the morning (or just rinse with water if you're not oily), one at night. That's it. Double cleansing only if you wore makeup or SPF—otherwise you're stripping protective oils your barrier needs. I used to cleanse morning, post-gym, and night like some kind of cleanliness martyr. My skin was perpetually tight and angry. Cutting back to twice daily made a visible difference within three days.
Avoid Hot Water and Long Showers
Water temperature above 95°F disrupts lipid organization in your barrier. Keep it lukewarm (honestly feels cold at first), and limit face-washing to under 60 seconds. Those 20-minute hot showers feel amazing but they're dehydrating your skin. I time mine now because I have zero self-control otherwise—set your phone alarm for 8 minutes and get out when it goes off.
No Physical Exfoliation
Scrubs, brushes, washcloths, exfoliating gloves—put them all away. Physical exfoliation creates microtears that worsen barrier damage and increase infection risk. I know the Clarisonic feels clean and high-tech, but it's sandpaper on compromised skin. Even gentle konjac sponges are too much right now. Cleanse with your hands only.
Stop Switching Products Constantly
Barrier repair requires consistency over 2-4 weeks minimum. If you're switching products every few days because you're not seeing instant results, you're resetting your progress. Stick with the same routine for at least two weeks before evaluating. I learned this after wasting $200 on products I tried for three days each, got impatient with, and replaced. Skincare is not instant gratification—if that bothers you, this is going to be a frustrating journey.
Don't Layer Ten Products
More is not better when your barrier is compromised. Stick to the essential barrier-first skincare routine checklist: cleanser, ceramide serum, moisturizer, SPF. That's four products during the day, three at night. Every additional layer is another chance for irritation. Those 10-step Korean routines are fantastic once your skin can tolerate them, but right now you need simplicity. Cut out the essences, the ampoules, the sleeping masks—just the basics.
For related barrier-focused routines with minimal steps, check out Best Budget Skin Barrier Serums for Damaged Skin, which includes only multi-tasking formulas that reduce product count.
Monitoring Your Barrier Recovery Progress
You need objective markers to know if your barrier is actually healing versus just "feeling better." I track these weekly because subjective feelings aren't reliable when you're sleep-deprived and surviving on coffee.
Visual Assessment (Weekly)
Take a clear, well-lit photo every Sunday morning before applying any products. Same lighting, same angle. Look for:
- Reduced redness especially around nose, cheeks, and jawline
- Less visible flaking even in dry areas that usually peel
- Smoother texture when you run your (clean) fingers across your skin
- More even tone as inflammation subsides
Keep these photos in a dedicated album because memory lies—you'll swear nothing is changing until you compare week one to week four and see dramatic differences.
Physical Sensation Markers
Track these daily in your notes app (takes 30 seconds):
- Tightness level after cleansing (0-10 scale, where 10 is painfully tight)
- Stinging with products (yes/no for each product)
- Dryness patches (how many, what size)
- Makeup application (does foundation pill or apply smoothly?)
When your tightness drops below 3 consistently for a week and products no longer sting, your barrier is approaching stability.
Product Tolerance Test (Every 2 Weeks)
Apply a small amount of a previously irritating product (like a gentle vitamin C serum or low-percentage retinol) to your inner forearm. Wait 24 hours. If there's no redness, itching, or irritation, your barrier might be ready for careful active reintroduction on your face. If it reacts, give it another two weeks before testing again. Don't skip this step and go straight to your face—I did that with a 0.5% retinol and spent a week looking sunburned.
Expected Timeline
- Days 1-3: You might feel worse before better as you stop compensating with overly harsh products. Stick with it.
- Days 4-7: Tightness should decrease noticeably. Flaking may temporarily increase as damaged cells shed.
- Days 8-14: Smoother texture, less sensitivity. Products stop stinging.
- Days 15-28: Barrier should be stable. Redness significantly reduced, hydration retained better, overall resilience improved.
If you're not seeing improvement by week three, you're either still using an irritating ingredient or you have an underlying condition like rosacea or seborrheic dermatitis that needs medical treatment. Don't waste more time—see a dermatologist.
Reintroducing Actives After Barrier Repair
Once your barrier is stable (products don't sting, no tightness, no flaking), you can strategically add actives back. Emphasis on strategically—not all at once, not daily, and not at maximum concentrations.
Reintroduction Order (Safest to Strongest)
Week 1-2: Azelaic Acid 10% Start with azelaic acid because it's the most barrier-friendly active. The Ordinary Azelaic Acid Suspension 10% costs around $9 for 1oz and can be used daily without irritation for most people. Apply after your serum, before moisturizer. If you tolerate this for two weeks with zero irritation, move to the next level.
Week 3-4: Niacinamide Increase If you were using 4%, try 5-10% concentration. If you're already at 10%, move to the next active instead.
Week 5-6: Retinol 0.25% or Retinaldehyde 0.05% Start with the lowest concentration, twice weekly (Sunday and Wednesday nights). Apply after moisturizer initially to buffer irritation. The Ordinary Retinol 0.2% in Squalane costs around $8 for 1oz—that's your entry point. Work up to three times weekly over a month before increasing concentration. For those interested in alternatives, Bioregenerative Peptides vs Retinol: Which Cell-Renewal Active Works Better? breaks down options if retinol still irritates your repaired barrier.
Week 7-8: AHA or BHA (Low Concentration) Start with 5% lactic acid or 0.5% salicylic acid, once weekly. The Ordinary Lactic Acid 5% + HA costs around $7 for 1oz. Sunday nights only. Wait four weeks before increasing frequency or concentration.
Week 9-10: Vitamin C (L-Ascorbic Acid 10% or MAP 10%) Only if everything else is tolerated well. Start with every other day, morning application. Timeless 20% Vitamin C + E Ferulic Acid costs around $26 for 1oz—but start with their 10% version first if you can find it, or use The Ordinary Ascorbyl Glucoside Solution 12% at around $12 for 1oz as a gentler alternative.
Rules for Safe Active Reintroduction

Only add one active at a time with two weeks between each addition. I cannot stress this enough—if you add retinol and vitamin C simultaneously and your skin freaks out, you won't know which one caused it.
Start with the lowest concentration and frequency—twice weekly max for the first month. Your ego might want to jump to daily 1% retinol, but your skin will pay the price.
Maintain your barrier-repair base routine—the ceramide serum, moisturizer, and SPF stay constant. Actives are additions, not replacements.
Back off immediately if you see any barrier compromise signs: tightness, stinging, redness, or flaking. Drop back to your basic routine for a week before trying again at lower concentration or frequency.
Never use multiple strong actives on the same day until you've been tolerating them individually for months. Retinol + AHA is a recipe for disaster on newly-repaired barriers.
The goal isn't to use every active possible—it's to use what your skin actually needs and can tolerate. After my barrier repair, I settled on azelaic acid daily and retinol twice weekly. That's it. Three actives less than my old routine, better results, zero irritation. Sometimes less really is more.
Final Check Before You Go
Here's your essential barrier-first skincare routine checklist for easy reference. Screenshot this or print it out and stick it on your bathroom mirror—that's what I did when I was rebuilding my routine and couldn't remember what went where at 6 AM.
Daily Morning Routine (6-8 minutes):
- pH-balanced cleanser (4.5-5.5)
- Niacinamide serum (4-5%)
- Ceramide barrier-repair serum (3:1:1 ratio)
- Ceramide-rich moisturizer
- Mineral SPF (zinc oxide 15-20%)
Daily Evening Routine (5-7 minutes):
- pH-balanced cleanser (double cleanse if makeup worn)
- Ceramide barrier-repair serum
- Ceramide-rich moisturizer (generous layer)
- Occlusive treatment (on problem areas or full face)
What to Avoid During Initial Repair (2-4 weeks):
- No retinol, AHAs, BHAs, vitamin C, or benzoyl peroxide
- No physical exfoliation (scrubs, brushes, washcloths)
- No hot water on face
- No over-cleansing (max twice daily)
- No product switching mid-routine
Weekly Progress Checks:
- Take comparison photo (same lighting)
- Track tightness level (0-10 scale)
- Note any stinging with products
- Document dry patches or flaking
- Test makeup application smoothness
Active Reintroduction Readiness (After 2-4 weeks):
- No tightness after cleansing
- No stinging with barrier products
- No visible flaking
- Patch test tolerated on inner forearm
- Consistent improvement for 7+ days
Budget Tracking (Cost per Complete Routine):
- Morning routine per day: ~$0.54 (Vanicream cleanser $0.06 + Good Molecules niacinamide $0.10 + Stratia serum $0.45 + CeraVe moisturizer $0.08 + Australian Gold SPF $0.09 = around $0.78)
- Evening routine per day: ~$0.72 (cleanser $0.06 + Stratia serum $0.45 + CeraVe moisturizer $0.08 + Vaseline $0.02 = around $0.61)
- Monthly routine cost: ~$40 (morning + evening × 30 days)
Compare that to the luxury equivalent using SkinCeuticals and La Mer, which would run around $280 monthly for the same functional results. You're saving around $240 per month with zero performance sacrifice—that's roughly $2,880 annually that could go toward actually important things like childcare or retirement savings.
Frequently Asked Questions
How long does it take to repair a damaged skin barrier?
A damaged skin barrier typically takes two to four weeks to repair if you follow a strict barrier-first routine with ceramides, cholesterol, fatty acids, and niacinamide while avoiding all actives and irritants. Severe barrier damage from overuse of retinoids or chemical peels may take up to eight weeks. You'll notice improvement within the first week with reduced tightness and sensitivity, but full barrier restoration requires consistent use of the complete routine without interruption.
Can I use retinol while repairing my skin barrier?
No, you should not use retinol or any exfoliating actives while repairing a damaged skin barrier, as retinol increases cell turnover and can further compromise barrier function by disrupting lipid organization in the stratum corneum. Wait until your barrier shows no signs of sensitivity, tightness, or flaking for at least one week before reintroducing retinol at the lowest concentration (0.2-0.25%) once or twice weekly, gradually increasing frequency over several months as tolerance builds.
What's the difference between barrier repair and regular moisturizing?
Barrier repair specifically restores the lipid matrix of your stratum corneum using ceramides, cholesterol, and fatty acids in a 3:1:1 ratio that mimics your skin's natural barrier composition, while regular moisturizing only adds humectants like glycerin or hyaluronic acid that attract water without repairing the underlying lipid structure. Products designed for barrier repair contain multiple ceramide types (typically 1, 3, and 6-II minimum), cholesterol, and essential fatty acids, whereas regular moisturizers may only include generic emollients and humectants without the targeted lipid restoration your compromised barrier needs to actually heal.
Final Thoughts

The **barrier-first skincare routine checklist